Showing posts with label buffet. Show all posts

Tuesday, December 14, 2010

Before and After

Pin It
I just stumbled across a picture of how the buffet looked when I bought it.

Thought I'd do a quick before and after post.

Before:


Broken door.  Missing glass.  Plastic red handles.  Weird middle door.  Ugly cowboy-style(?) painted design on remaining glass door.  Warped drawer bottom.  And it was honey gold.  Ew.

After:

 
Door fixed by the father-in-law.  (Thanks Gord!)  Glass replaced after much teeth gnashing and a few curse words.  New handles.  Middle door removed and different shelves put in.  New unwarped drawer bottom.  Drawers re-lined with fancy paper.  Thick ugly varnish stripped and fresh black paint applied.

I like.

Update on Buffet Doors

Pin It
They are done!

Whew.

I had Ryan measure out and draw an arch on the opposite side of the glass with a washable marker.  Then I leaded it.  And it turned out straight! Go me!


I really like the black outline.  I think that's part of what threw me off with just the frosting (well that and all the overspray and etched spots!)  But since my stencil was outlined in black as well, the plain frosting just looked a little blah.  So I guess this was an okay screw up in the end.  Also, they took way more clear frosting that I thought they would, so I had to make another trip to Michael's to buy more.

Here it is, fully assembled.


We have doors.  Holy crap.


Up close and personal.

Six months later, I have finally finished the never-ending buffet project.

Sunday, December 12, 2010

Buffet Doors Part Two? Three? Never ending?

Pin It
So, those doors.  The bane of my existence. 

I decided to try an $8 fix first before I spent the money on new glass.

Plus, you know I just couldn't let it go until I had attempted to salvage them.

So I decided to stain glass them.  The hope was to disguise the etched mess.  Turns out I actually like them better this way.  I like the black outline of the design now.


Here is one with the leading on.  I simply flipped the plexi over and used the old frosted design as a guide and piped on the leading. 

Then after it dried, I filled in the design with the clear frosting, which goes on white and dries semi-clear.  I also cleaned off all the old frosting on the other side.


Not looking so bad now!


However.

Oh yes, you knew there was a however

Up close you can still see this:


The frosting has dried, the old stuff removed from the other side, and you can still see where the combination of the sharpie and the lacquer frosting etched the glass.

Lovely.

So I'm going to pipe an arch around it and frost around the whole design.

First up:

Make your husband do the marking so that it is at least on there straight.


Hey, we've seen how I do straight.....

Friday, December 3, 2010

Disappointment

Pin It
Utter, crushing disappointment.

That was what I was feeling the other night.  Boo.

We finally bought the plexi-glass for the buffet doors.  I finally got the buffet door painted! Go me.

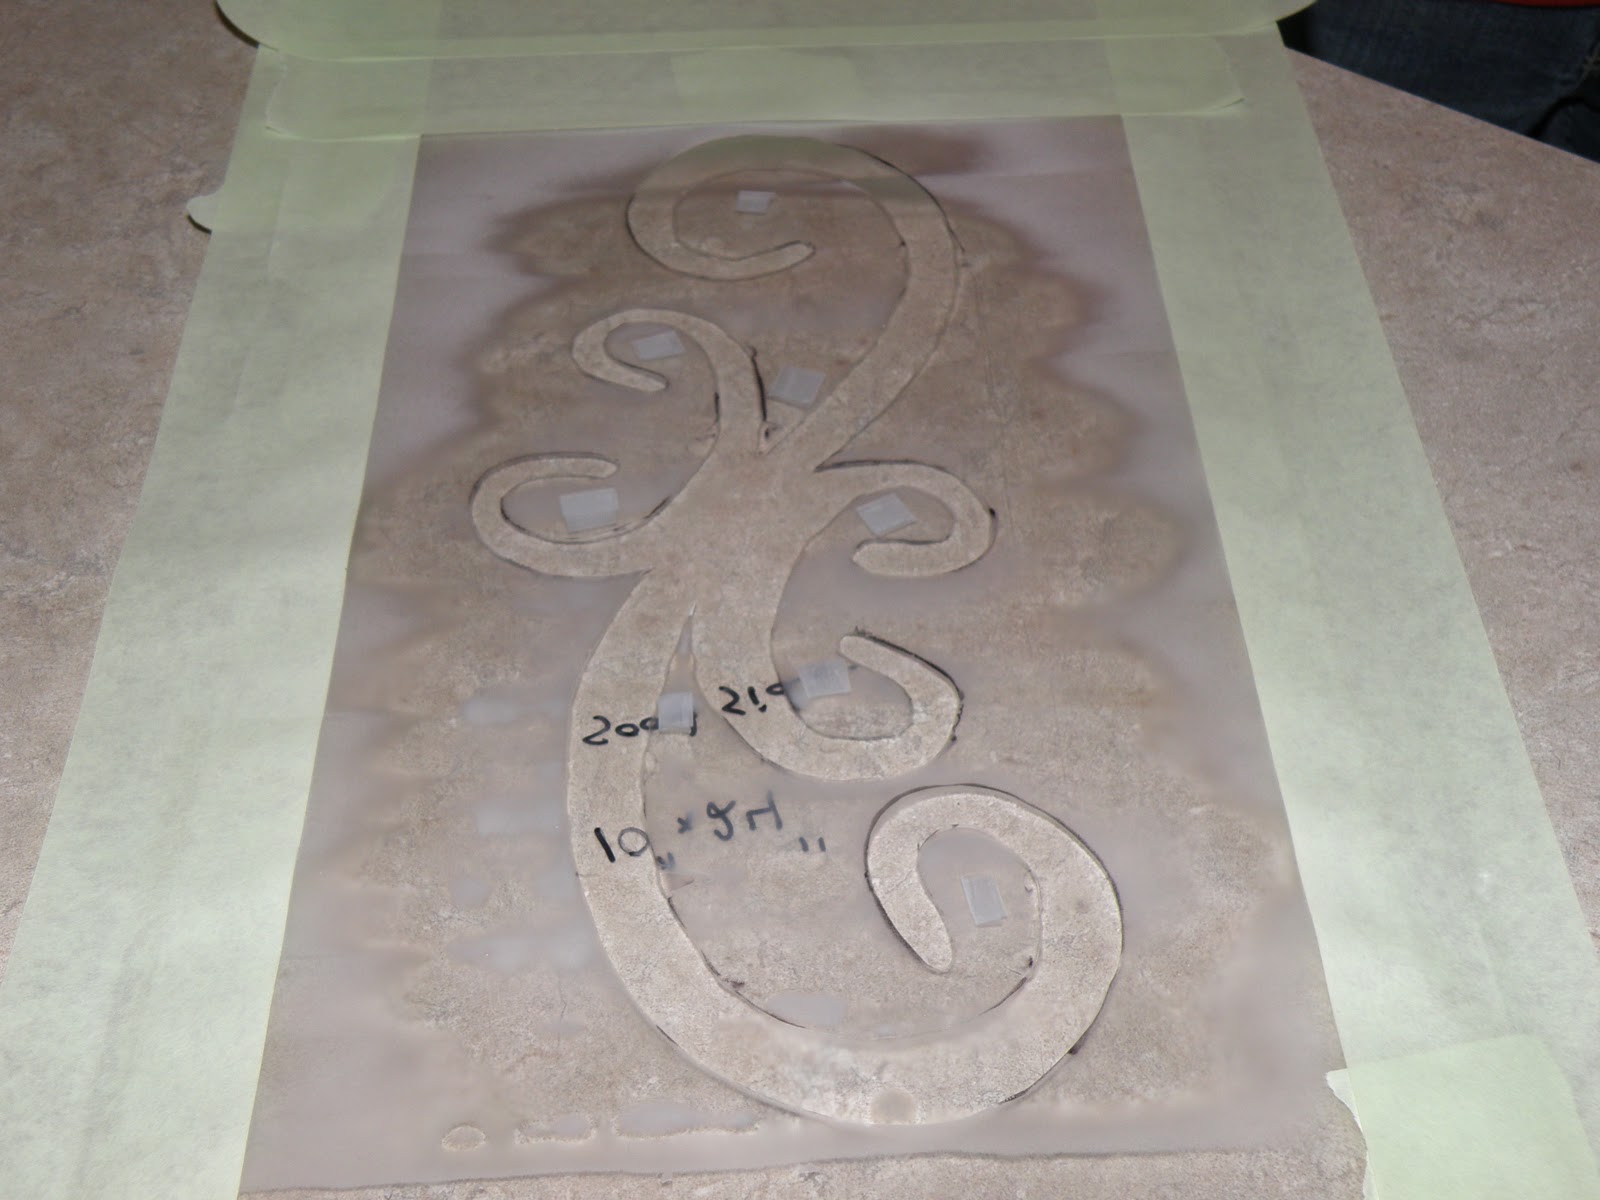
I wanted a design frosted into the glass, and had found some inspiration in the form of my floor lamp.


I traced it out, with the help of my mom holding the paper behind it.

Put the design on to some plastic. 


Ryan cut it all out carefully and put it on the glass.


I made him spray paint it too.  I'm too impatient for it, and he does it all the time at work anyways.


Waited for it to start "frosting"


I don't even want to show you the picture of it after we took the stencil off.

My original plan was just to fix it some how, some way, or just start again and then show you the buffet finally done.

However.  I'll share my pain.

Even Rodeo can't bear to look.

Okay, so from a distance, and if you're farsighted, nearsighted or have your eyes closed, they don't look bad.  They almost look like what I wanted.

Here's the ugly close-up.

Let's just not talk about it.

Yes, I bought laquer thinner.
Yes, I tried to fix this mess.

No, it didn't work. Gah!  That's all I have to say.

I've decided that how this story ends, in the end, will be better and more epic than this anyways.

So all will be good.  Eventually.

Thursday, September 9, 2010

The Buffet

Pin It
Okay.  So I don't have the buffet totally done to where I'm happy with it. 

BUT I do have it painted and in the house.  So I thought I'd update the pictures for it.

A before picture to remind you:


There she is, in all her glory.  Ugly plastic red handles, questionable paint on glass doors, honey varnish all over.  Not to mention:  wonky drawers with warped bottoms, weird middle door, and a missing glass door on the right, with only 3 out of 4 wood pieces to rebuild the door out of.

First off, get that varnish off of it!  Sure my FIL nearly had a heart attack when I said I planned on painting it, but my house is  mahogany..not honey oak from the 60s. 

Out to the backyard, armed with supplies!

Mid-removal.


I have to say, removing the varnish was a breeze.


After I had it all off, and scuffed clean, it was time for remodelling! 

I didn't like that it was two long shelves inside of it.  I hated that middle door.  Oh, Ryan! Fix please!


We bought some pine shelving from HD and Ryan cut them down to fit vertically into the buffet, making three separate areas instead of one big one.  He added new supports for the shelving, making the left side have two shelves and the right side have three.

Ready to paint.


Have you ever painted the inside of a cupboard black?  If you start in the middle of the piece and work out to the edges, I swear it's like painting all the happiness out of the world.  Wonder if JKR was painting a small space black when she was thinking of how to describe dementors...  Anyhow, it gets really, really hard to see where you haven't painted yet if you start in the middle first.  Do all the edges and corners first, then continue to paint away the happiness.  I also painted in spots no one will ever see unless they decide to stand on their heads and look way way up into the buffet.  Fun. 

I have to say, I love it black. I went to HD and bought some really nice handles for $13 each (ouch!).  We repurposed the two long shelves and cut them to make the three smaller shelves.  Bought a new skinny backboard piece for the bottom drawer.  Now we are awaiting the re-made door from the FIL and glass needs to be cut and bought for the doors as well.  But I thought I'd get it up and on here for you to see at least some progress on it!


TADA!


Please ignore the messy stack of newspapers and flyers!! :)